The law around industrial action ballots is deliberately bureaucratic and complex in order to provide opportunities for lawyers representing employers and other anti-worker forces to get unelected judges to intervene against workers and their unions, often over mistakes that would never have affected the ballot result. This makes unions very reluctant to start ballots until membership data has been thoroughly checked. From members’ point of view, accurate membership data helps push up turnout in a ballot and communication with members during a dispute. Data cleansing is an opportunity to collect members’ non-work email and mobile numbers which could be vital if reps need to communicate with them during a strike. At least to start with, the new electronic balloting process cannot use employer or union email addresses because of the risk of them being blocked, spied on or tampered with – so having clearly identified personal contact details is critical if you may want an electronic ballot. All this makes data cleansing a key part of a dispute, even if you have kept records up to date to be as ‘strike ready’ as possible.
Just asking members to check their membership records, for example via the union website or a phone line, is likely to get a poor response. Many members forget that they moved house or changed their email address since they joined, assume it is all OK and don’t bother to check. So it’s best to proactively ask every member to confirm or correct their details and to make this as easy as possible.
If you have a small bargaining unit, reps may be able to walk round with a membership list, speak to every member individually, record any corrections and tick people off. For a larger group of members this is impractical, particularly if they work remotely, at different locations or on different shifts.
The best method I’ve found to do thorough data cleansing without an insurmountable workload is to take advantage of a ‘mail merge’ tool to generate individual emails to each member. Members are far more likely to respond if you show them that you hold incorrect data about them than if you just ask them to check. In this article, I’ll take you through how to do it step by step. I’ve used Microsoft Office 2024 on Windows – details would differ for other software or versions, but the principles are the same.
Prepare your membership list
When you save membership data as an Excel spreadsheet it is good practice to encrypt it with a password.
The first step is to take a copy of your membership list, with all the fields you require, for all the members who may be included in the ballot. You’ll want to add extra columns to record when a member has responded and when any corrections have been applied to membership records.
I’ve prepared a template spreadsheet which you can download. You’ll need to copy your membership data into columns A to Q in it. In row 2, columns R to AC are set up with formulae to obfuscate (hide) parts of members’ personal data so that it can be sent by email without infringing their privacy – in the same way that an email from your bank often includes a partial card or account number. Row 2 has some dummy member data in so you can see how the obfuscation should look in cells R2 to AC2. You will need to copy the formulas in cells R2 – AC2 down onto as many rows as have data in.
It’s not unusual that union membership records have codes or gobbledegook for certain fields (e.g. workplace). You’ll need to replace these with something the member will understand.
Check that the member data is being correctly obfuscated in columns R to AC.
Prepare your letter
In Microsoft Word, you need to create a template for the emails you will send to each member. I’ve prepared an example letter you can download and adapt. You should keep it short, but you might want to add other relevant information or asks. For example, if you know when industrial action is possible, you might highlight the need for members to let reps know if they might be off work throughout the whole of that period (e.g. maternity leave, long term sickness, or leaving the employer).
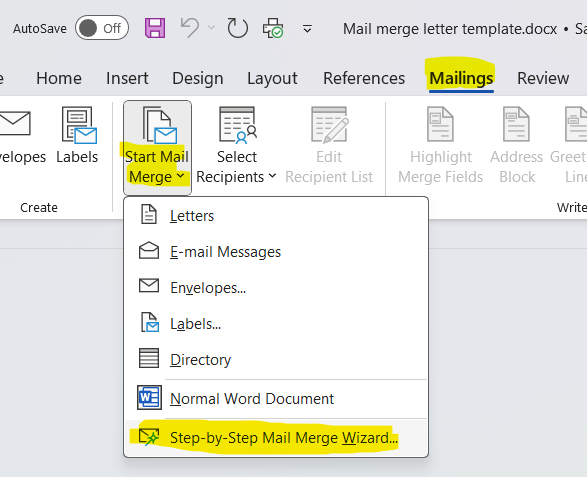
On the ribbon, select Mailings, Start Mail Merge, and Step-byStep Mail Merge Wizard:
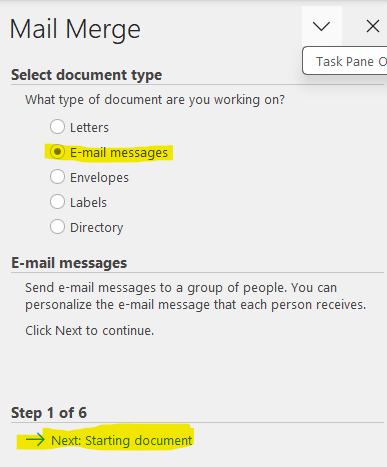
This will open a Mail Merge pane at the side of the screen inviting you to select a document type. Choose E-mail messages and click Next: starting document at the bottom:
The next step in the wizard invites you to select the starting document. Choose use the current document and click Next: select recipients.
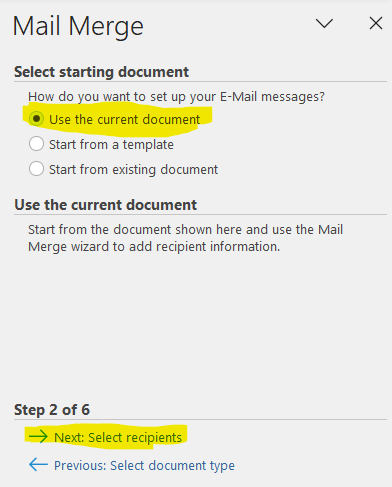
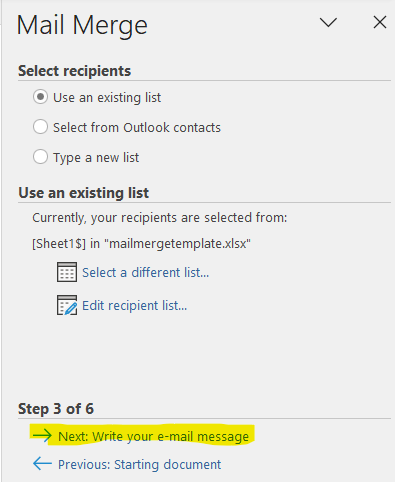
Step 3 invites you to select recipients. Choose Use an existing list and click Browse:
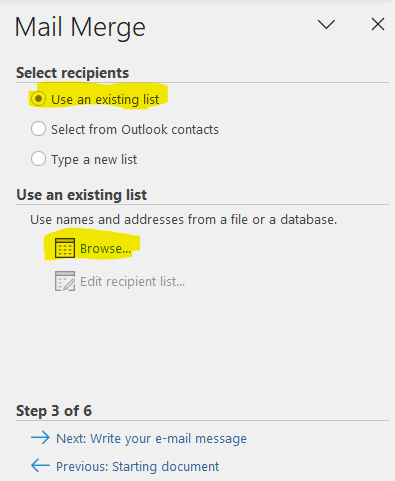
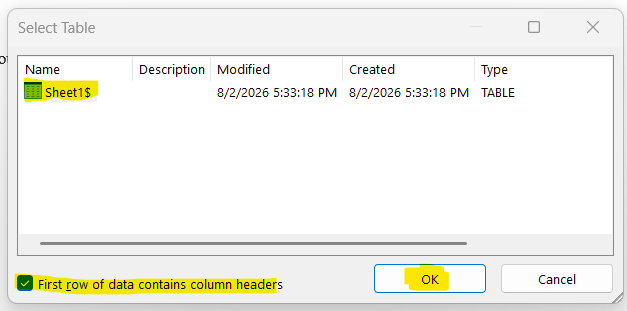
When you click Browse a normal file selection dialogue box should open up, but probably with a strange folder selected. Navigate to where you saved the spreadsheet with the obfuscated membership details, select the file and click Open. Word will invite you to select a table from the file – there is only one, so select that, make sure the box indicating that the first row has headers is ticked, and click OK.
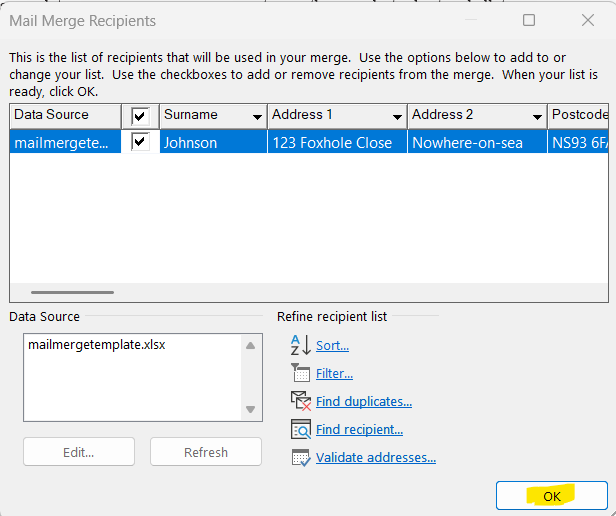
A new dialogue will appear inviting you to select mail merge recipients. We won’t do anything with this, but you could use it to exclude certain from the mailing individually or with a filter. We will just click OK to include them all.
At the bottom, click Next: Write your e-mail message.
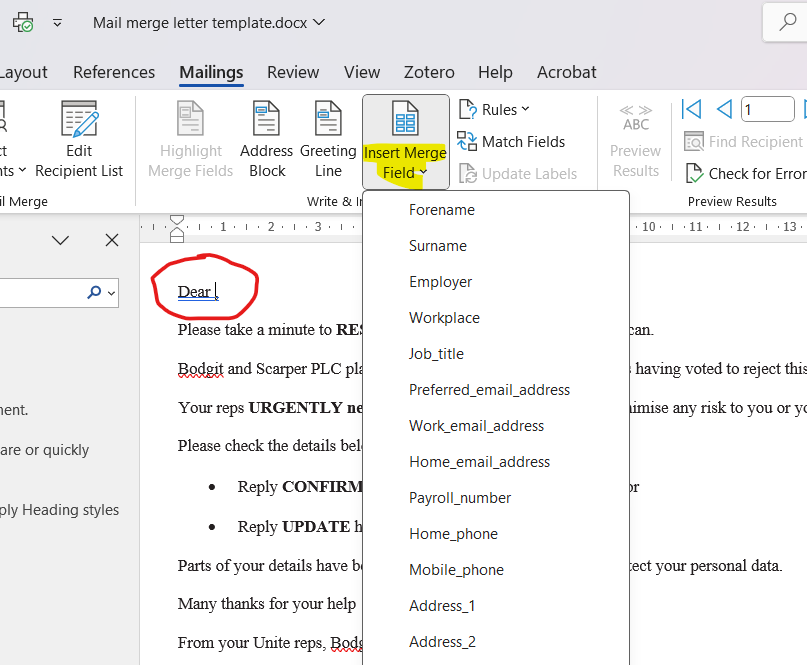
Step 4 is where things get interesting. After the word ‘Dear’ at the start of the letter, add a space then from the ribbon choose Insert Merge Field, which will show a list of all the column headings in your spreadsheet:
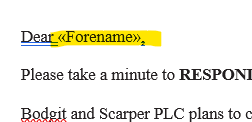
If you choose Forename the document should look something like this:
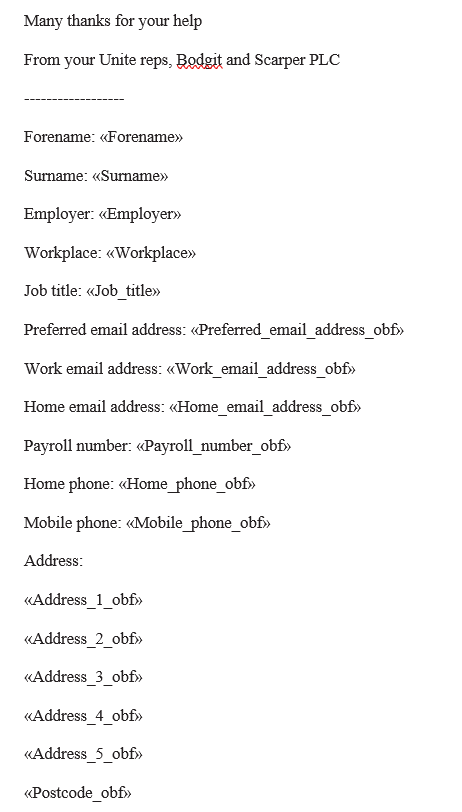
Lower in the document, you will see where the member information needs to go. Add the relevant merge fields, choosing obfuscated ones where they exist, so the end of your document looks something like this:
When you have finished, click Next: Preview your e-mail messages at the bottom:
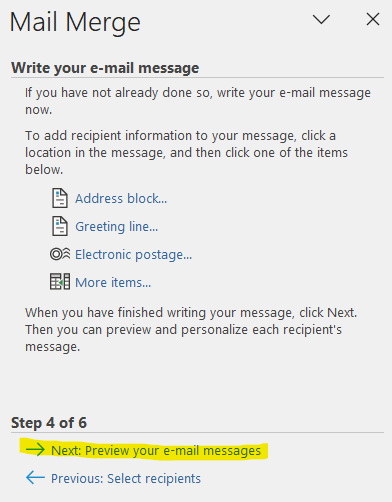
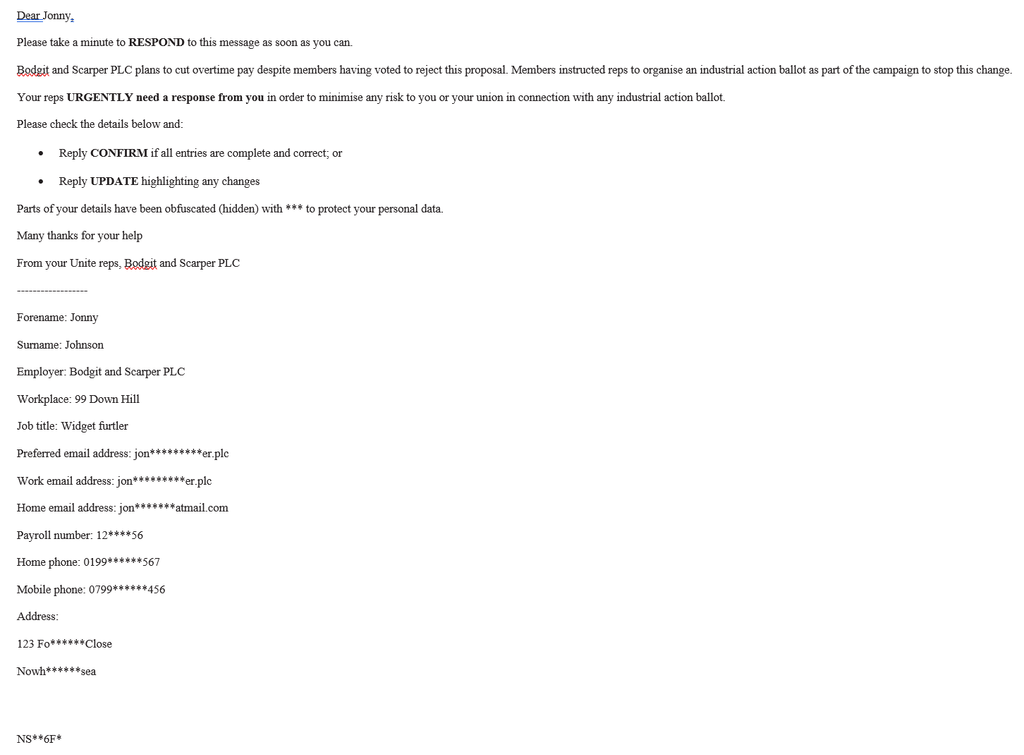
This will show what the email to your first recipient would look like. There will be blank lines in the address if not all fields are used. Check you are happy with how it looks, and double check that any information which should be obfuscated is. You can edit the email in this screen (but don’t edit the merge fields!), or go back to previous steps at any time.
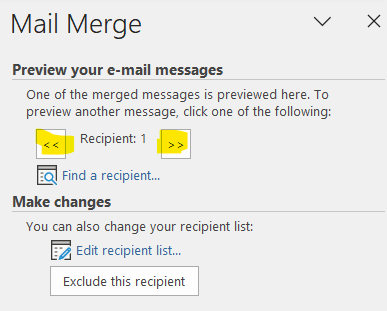
You can use the arrows to page through and check other recipients. It’s worth checking a few.
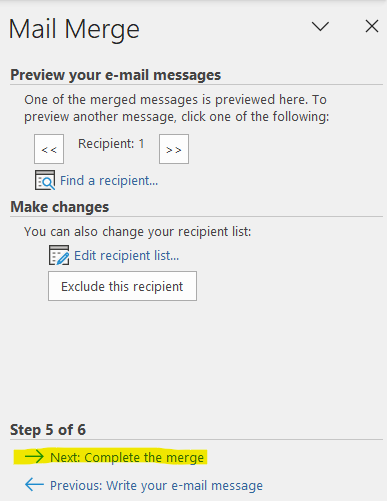
When you are happy, click Next: Complete the merge.
You already selected that you were sending emails, but you need to click Electronic Mail.
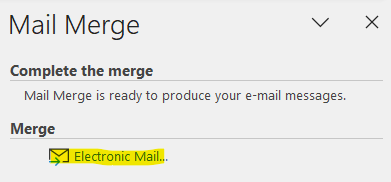
This will bring up the ‘Merge to E-mail’ dialogue. Take great care with this step – this is where emails are actually sent and there’s no spellcheck for the subject line.
In the message option, you need to select the field containing the email addresses you want to send to, typically Preferred_email_address. Choose an attention-grabbing subject line. I used ‘Urgent UNITE membership check *PLEASE RESPOND*’
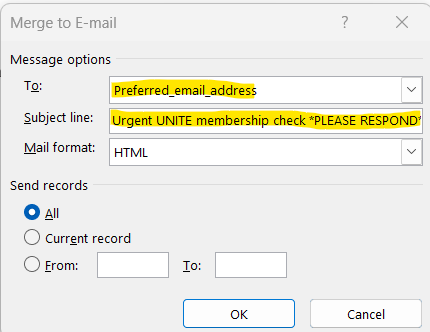
You could use the options under Send records above for a test, only sending one record or a small number, to make sure it works OK.
Choosing your email account really matters – where you send from is where responses will come back to. You don’t want a rep who is about to go on holiday to send them from a mailbox only they can access. Word will send your emails via Outlook, using whatever account you are logged in as. If you have a union mailbox you want to send from, make sure you are logged in to that account (not just viewing it from an individual account).
When you are happy, click OK and emails will start being sent. If you look at your Outlook Outbox or Sent Items you will see them gradually appearing as Word works through the list.
Results
My experience is that a large minority of members will respond to a message like this within a day and reps can get busy processing all the responses. If you’ve recorded in your spreadsheet who has responded it is easy to do a second email just to members who haven’t, which produces another surge. This approach typically gets responses from the majority members with minimal work. Reps can focus their efforts on chasing up a manageable number of stragglers in person, over the phone, by text message, over Teams etc.
I’ve tried this method in different employers and unions. In one employer we got positive confirmation from every single member, despite them being spread across over a hundred workplaces. In another we got it down to just one member who wouldn’t respond even when contacted personally.
Having good data reduces the legal risks of a ballot, increases ballot turnouts and helps you communicate with members which is critical during a dispute.
Don’t forget that you need to keep membership records up to date throughout a dispute, not just for the start. Fully going through the exercise increases members’ awareness of the need to let reps know if their details change.